
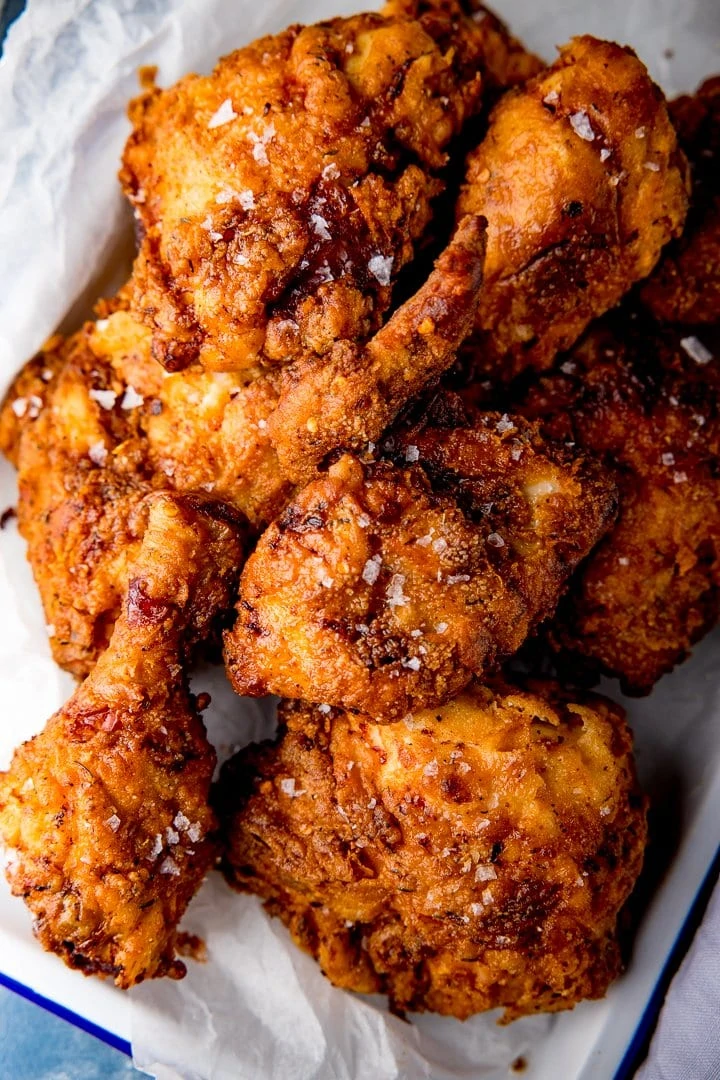
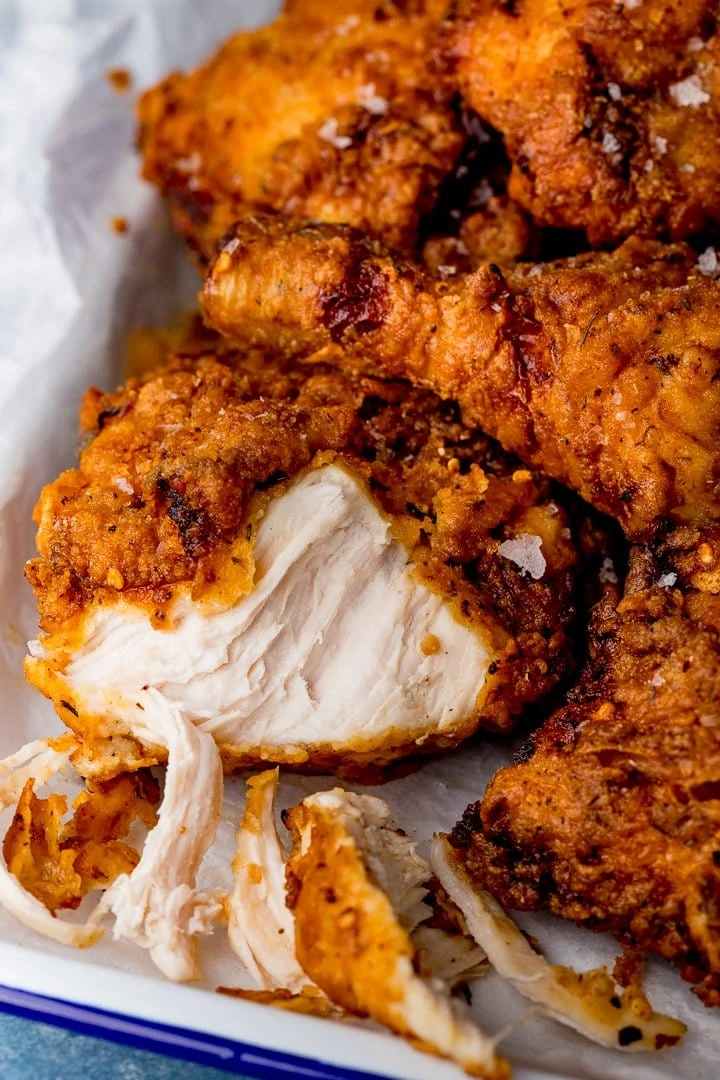
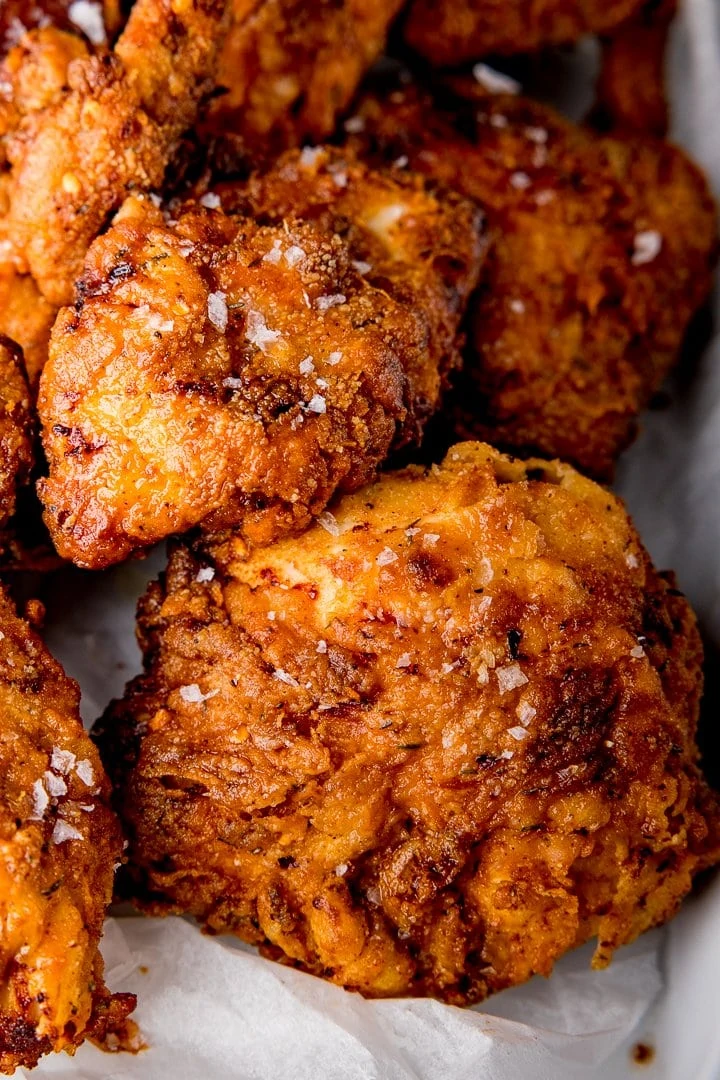
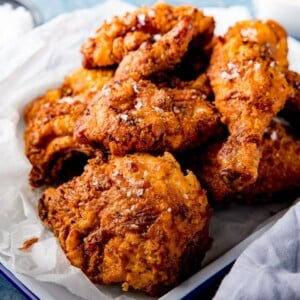
Make your own finger-lickin’ chicken at home with my crispy buttermilk fried chicken recipe. I’ll also show you how to joint a whole chicken just like that famous chicken shop.
This is my go-to recipe that I’ve developed over many years – my kids actually prefer this one to the takeout version!
I’m delving into my 5 years experience working in a fried chicken shop as a teenager for this one.
Whilst I was there, I learned how to joint the chicken, then we’d coat it in a special flour mixture (not a wet batter), and then it would be deep-fried in a big heavy-duty a pressure fryer.
Of course, we’re having to do it without a pressure fryer at home, but you can still get perfect crispy-coating results from deep-frying it in a pan or a deep fat fryer.
I’ve also added an extra step of marinating the chicken in a seasoned buttermilk mixture for the juiciest, most tender chicken.
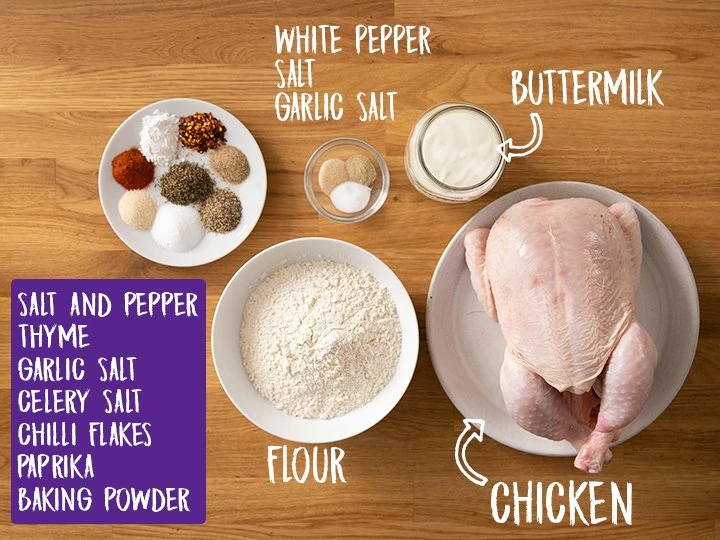
What do we need?
How to make this buttermilk fried chicken
Full recipe with detailed steps in the recipe card at the end of this post.
Jointing a chicken into 9 pieces
- First of all, I thoroughly recommend you watch the video (just above the recipe card) for this one. It’s so much easier to understand when you can see exactly what’s happening.
- Take a whole chicken and place it on a secure chopping board (1).
- We start by using a sharp knife to chop off the parson’s nose – which is the little tailpiece at the bottom of the spine (2).
- Then separate the lower half (thigh and leg area) of the chicken from the upper half – cutting through the backbone (3 and 4).
- Place the lower half of the chicken on the board skin-side-up and cut the lower half of the chicken in half – so you have two leg pieces that each consist of the thigh and drumstick (5).
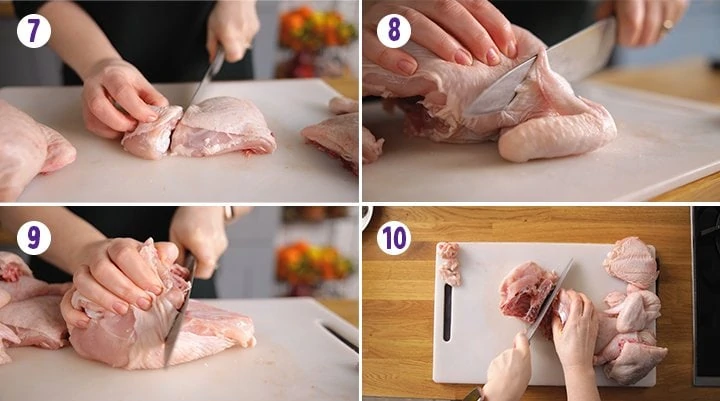
- Now we feel for the joint between the thigh and drumstick (6).
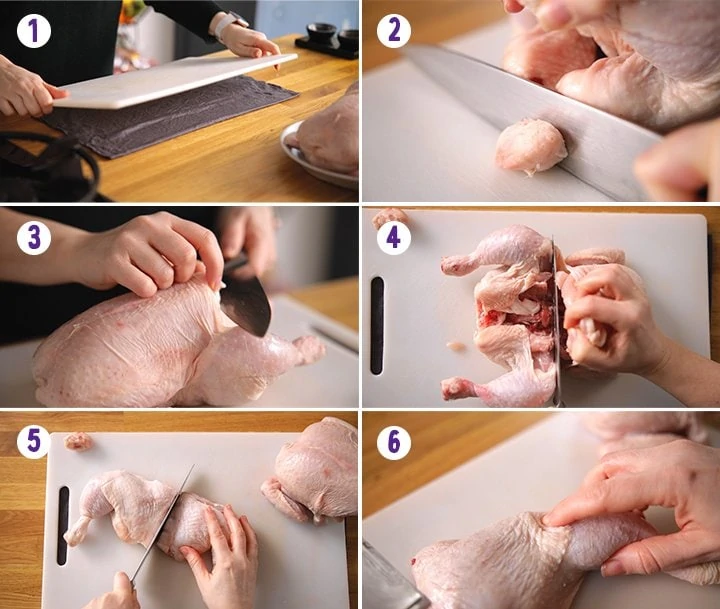
- Once you find that joint, cut through it so you have a thigh and a drumstick. Repeat with the other side (7).
- Cut off the wings at a 45-degree angle to the chicken body (8).
- Turn the chicken over so it’s breast-side down and cut the keel piece – cutting through the chicken at a 45-degree angle (9).
- Now slice the remaining rib/breast part of the chicken in half. To make the pieces even-sized, one of the pieces should contain the backbone and the other piece should contain the upper part of the sternum (breast bone) (10).
Marinating and frying the chicken
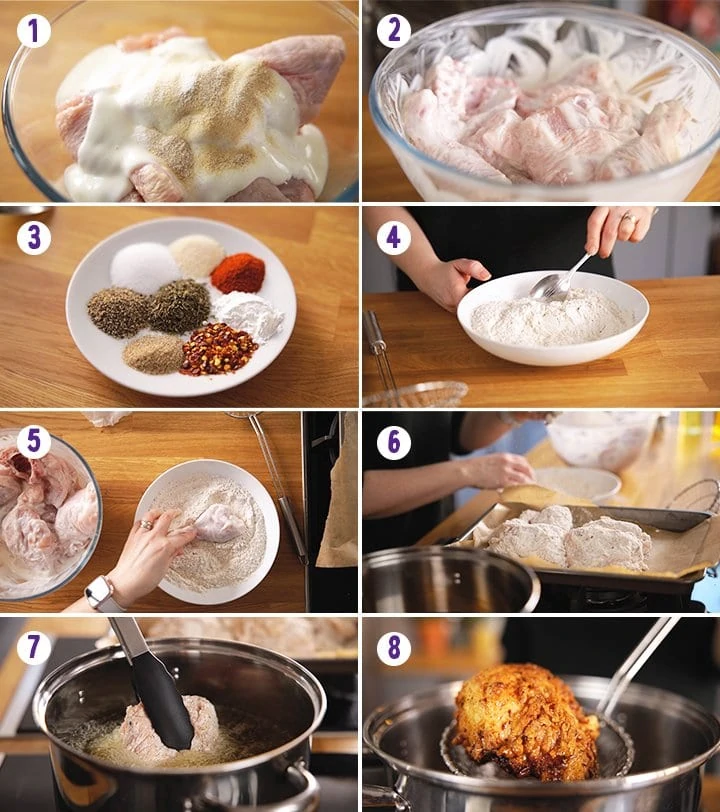
- Marinate the chicken in a mixture of buttermilk, salt, pepper and garlic salt (1 and 2).
- Mix together the crispy coating ingredients in a large bowl (see recipe card below) (3 and 4).
- Lift a piece from the marinade and dredge in the crispy coating mixture. Repeat for all the pieces (5 and 6).
- Deep fry the chicken in batches of 2 or 3 pieces for 7-8 minutes until golden brown and cooked in the middle (7 and 8).
What to serve it with
You can serve this fried chicken with:
- Fries! I’ve got:
- Potato Salad
- Coleslaw! Try the honey mustard coleslaw from this post
- Mashed potatoes? Although it’s not something we generally serve with fried chicken in the UK, I believe it is in the US.
- Or how about a lovely Cobb Salad!
Can I use ready cut chicken pieces?
Yes, you can use ready-cut bone-in pieces such as wings, drumsticks, thighs or bone-in chicken breast.
I don’t like bones in my chicken!
This method and coating works great for boneless and/or skinless chicken pieces too.
The chicken generally takes a little less time to cook through with boneless pieces. Ensure the chicken is piping hot throughout and no longer pink in the middle.
Watch how to make it

Stay updated with new recipes
***Subscribe to the newsletter to hear when I post a new recipe. I’m also on YouTube (new videos every Monday and Thursday) and Instagram (behind the scenes stories).***
Crispy Fried Chicken
Ingredients
Chicken and Marinade:
- 1 whole medium chicken Note 1
- 240 ml (1 cup) buttermilk
- ½ tsp salt
- ¼ tsp white pepper
- ¼ tsp garlic salt
Crispy Coating:
- 180 g (1 1/2 cups) plain (all-purpose) flour
- 1 ½ tsp salt
- 1 tsp ground black pepper
- ½ tsp garlic salt
- ½ tsp celery salt
- 1 tsp dried thyme
- 1 tsp paprika
- 1 tsp baking powder
- 1 tsp chilli flakes optional – this adds a slight spicy kick. Add just a pinch or leave out entirely if you prefer
Also:
- vegetable oil for deep frying at least 2 litres or 2 quarts
Instructions
To joint the chicken:
- Take a whole chicken and place it on a secure chopping board. Ensure you have a large, sharp knife.1 whole medium chicken
- Chop off the parson’s nose – which is the little tailpiece at the bottom of the spine
- Starting with your knife angled horizontally just underneath the pointy end of the breast, cut through the chicken to separate the lower half (thigh and leg area) of the chicken from the upper half. As you cut through, you'll change the position of your knife to point downwards so you can cut through the backbone.
- Place the lower half of the chicken on the board skin-side-up and cut the lower half of the chicken in half – so you have two leg pieces that each consist of the thigh and drumstick.
- Using your fingers, feel for the joint between the thigh and drumstick. Carefully cut through the joint and repeat with the other leg.
- Cut off the wings at a 45 degree angle to the chicken body, ensuring you cut a chunk of meat (about the size of a walnut) off along with the wings.
- Now you're left with the breast section. You can cut this into 2 or 3 portions. I prefer 3, as that's how they do it in the UK chicken shops. See the notes section to show you how to cut into 2 pieces if you prefer.
- Turn the chicken over so it's breast-side down. Starting from the pointy end, with your knife horizontal initially, cut through the chicken at a 45 degree angle. This will give you the keel piece.
- Now slice the remaining rib/breast part of the chicken in half. To make the pieces even-sized, one of the pieces should contain the back bone and the other piece should contain the the upper part of the sternum (breast bone).
Marinade:
- Place the chicken pieces in a bowl. Add the buttermilk, salt, pepper, and garlic salt. Mix together, cover and place in the fridge to marinade for at least 1 hour (up to overnight)240 ml (1 cup) buttermilk, ½ tsp salt, ¼ tsp white pepper, ¼ tsp garlic salt
Crispy Coating:
- Preheat the oven to a low heat (to keep the cooked chicken warm).
- Heat a large pan of vegetable oil (or preheat your deep fat fryer) until hot (you can test by dropping a small cube of bread in there, if it rises immediately to the top and starts to bubble rapidly, it’s hot enough). You’ll need at least 2 litres (2.1 quarts) of oil – but make sure your pan is no more than one-third full.vegetable oil for deep frying
- Mix together the crispy coating ingredients in a large bowl.180 g (1 1/2 cups) plain (all-purpose) flour, 1 1/2 tsp salt, 1 tsp ground black pepper, ½ tsp garlic salt, ½ tsp celery salt, 1 tsp dried thyme, 1 tsp paprika, 1 tsp baking powder, 1 tsp chilli flakes
- Take the chicken out of the fridge. Lift a piece from the buttermilk and allow the excess to drip off. Dredge the chicken in the crispy coating mixture – ensuring it’s fully covered. Place on a tray and repeat until all of the chicken is coated.
- Once the oil is hot enough, add in 2 or 3 of the chicken pieces. Give each piece a few seconds before you add the next, and lower them in slowly to ensure the fat doesn't bubble over.
- Cook for 7-8 minutes until golden brown and cooked in the middle. You can check this by cutting open a piece of chicken, if it’s no longer pink in the middle, it’s cooked.
- Place on a tray in the oven to keep warm whilst you cook the rest of the chicken.
- Once cooked remove all the pieces of chicken from the oven and serve.
Video
Notes
Note 1 –
You can use bone-in chicken pieces instead of jointing a whole chicken if you prefer.To cut the breast into two pieces (no keel) instead of three:
Cut through the carcass between the backbone and the ribs and discard the backbone (or save it to make stock). Cut the remaining piece of chicken in half, cutting through the breastbone to give you two large breast pieces.Can I make it ahead?
You can marinate the chicken and cover it in the crispy coating ahead of time. Once coated, cover and refrigerate it, but ideally for no more than a few hours.During this time the coating will become sticky instead of powdery – but that’s fine. You’ll still get crispy results. If you wanted to cook the chicken ahead of time, you can do. Then cool, cover and refrigerate for up to a day. Reheat in the oven on a tray at 175C/350F for approx 20 minutes (or until piping hot throughout).
Cover the chicken for the first 10 minutes, then remove the cover to help the chicken crisp up.
The chicken won’t be quite as juicy, but it will still be very tasty.
Can I freeze it?
I don’t recommend freezing the uncooked-coated or the cooked chicken. The chicken will be dryer and not as crispy upon defrosting and reheating.A note on nutritional info
Nutritional information is approximate per average piece (the pieces are different sizes, so I’ve taken an average of the 9 pieces). I’ve estimated 1 tbsp oil being absorbed per piece of chicken.Nutrition
Nutrition information is automatically calculated, so should only be used as an approximation.
More fantastic fried chicken recipes
- Buttermilk Chicken Burger with Honey Mustard Coleslaw
- Crispy Chicken Tenders – for those who don’t like their chicken pieces on the bone
- Crispy Korean Fried Chicken
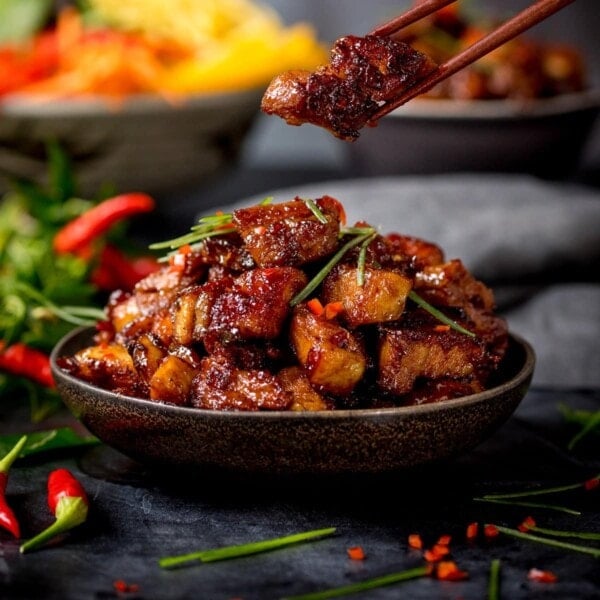
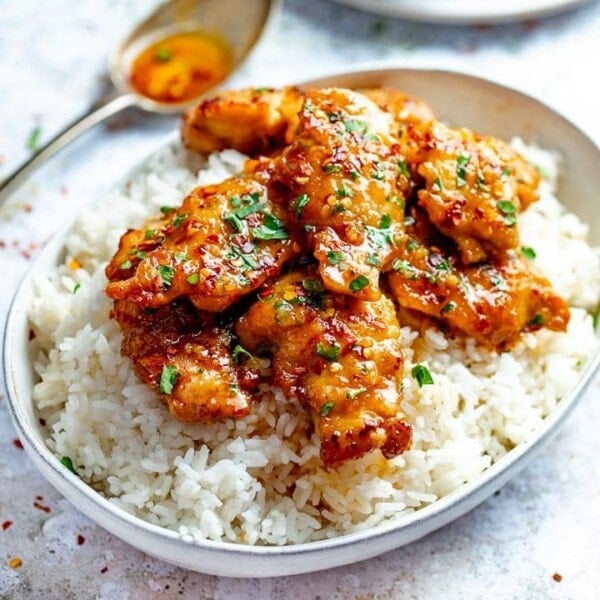
- Sticky Sesame Chicken in a lovely crispy coating
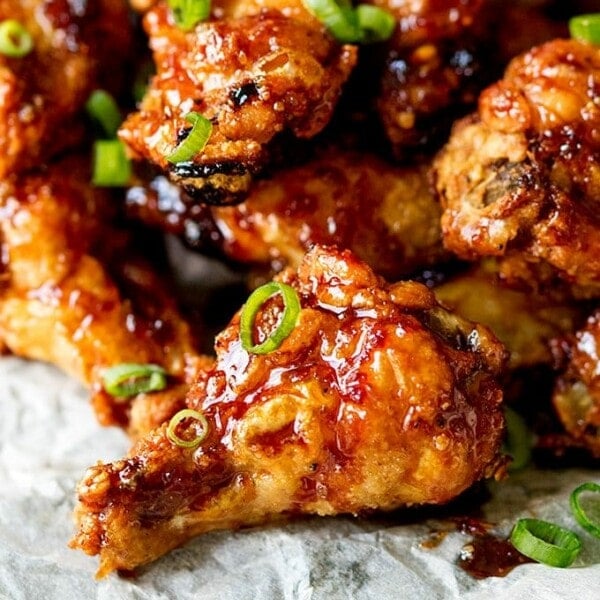
- Sticky and Crispy Chicken Wings
Some of the links in this post are affiliate links – which means if you buy the product I get a small commission (at no extra cost to you). If you do buy, then thank you! That’s what helps us to keep Kitchen Sanctuary running. The nutritional information provided is approximate and can vary depending on several factors. For more information please see our Terms & Conditions.


Hi, I want try this recipe but I don’t like frying in oil so would this work in an air fryer? Phil
Tried this with GF flour tasted amazing, thank you so much 😋
Hi Nicky,
The recipe sounds delicious. Will definitely try it.
Question: Can I substitute the buttermilk with Greek yogurt for the marinade?
Hi, I haven’t tried it, but I think it should work fine. I would water the yogurt down a little, as buttermilk is thinner than greek yoghurt.
HI Nicky,
Any suggestions on what to do with the oil left over after frying? It seems an awful waste to throw it away after one use.
Kind regards,
Paul
Hi Paul,
I tend to cool my oil, then strain and store it back in the empty bottle. I tend to use the oil up to three times before disposing of it.
This looks so tasty and juicy – great recipe and stunning photos too, thank you for the inspiration!
Emma 🙂
Hi Nicky,
I cannot get buttermilk where I live, any ideas for a substitute?
Hi Stephen, you can make your own buttermilk by mixing 1 cup (240ml) of milk with 2 tbsp of fresh lemon juice. Let it sit for 15-20 minutes, and it will thicken and curdle slightly. It will be slightly thinner than regular buttermilk, but will be just fine as a replacement for this recipe.
Would this work in an actifry air fryer?
Sorry Jo, I haven’t got an air fryer so I can’t be sure, but I don’t think you’ll get that thick crunchiness you get with deep frying.
You really need that oil for the same crisp result you’d get at a fried chicken shop.
However, you may be able to use the air fryer if you’re happy with a lighter finish. I think you’d have to partially cook the chicken pieces, then brush or spray all over with oil and continue to cook until crisp. You may find the coating is more delicate or more likely to fall off a little with not having the hot oil helping to adhere to the crispy coating to the chicken.
I just made this with an air fryer and it came out delicious. I lightly sprayed with oil on both sides prior to cooking and turned the pieces halfway through. Great taste!